Introduction: The Era of Desktop Industrial Power
The landscape of Bitcoin mining has shifted. We have transitioned from the CPU era of 2009 to the industrial-scale warehouse era, and now, we are witnessing the resurgence of the “Prosumer” miner—individuals reclaiming the network’s decentralization from their desktops.
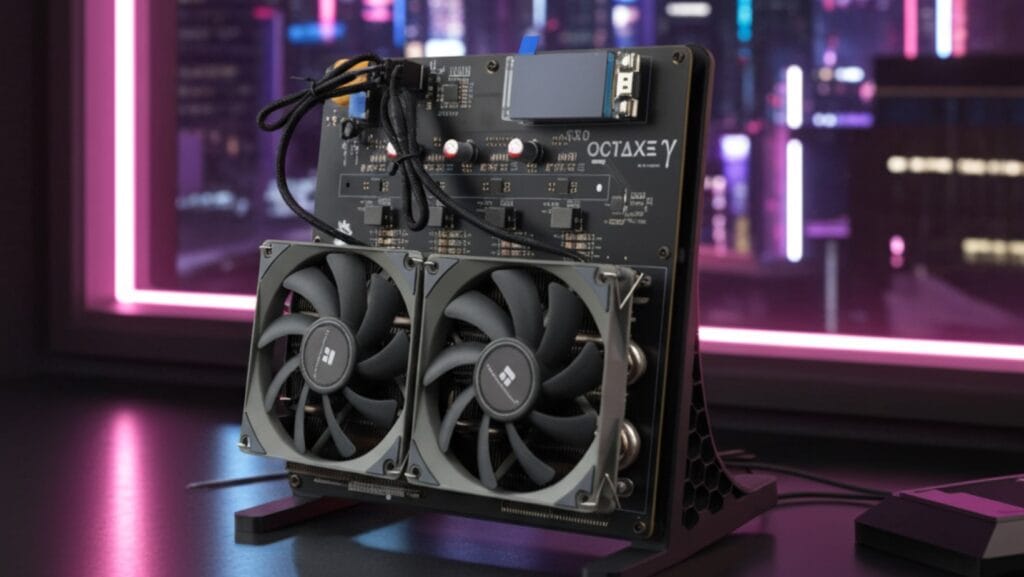
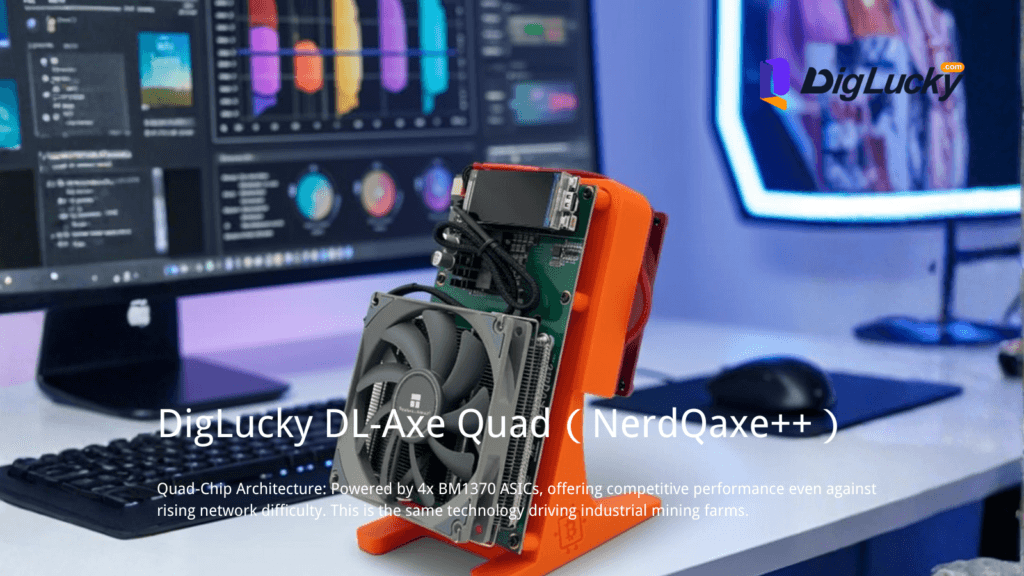
The NerdQaxe++ represents a paradigm shift in this narrative. Unlike single-chip entry-level devices that serve primarily as introductory tools, the NerdQaxe++ utilizes a Quad-Chip Architecture to deliver industrial-grade hashing density in a desktop form factor.
At its core lies the Bitmain BM1370 ASIC, the same silicon driving the enterprise-grade Antminer S21 Pro. While traditional home miners struggle to break the 500 GH/s barrier, the NerdQaxe++ leverages four of these chips to deliver a baseline of 4.8-6 TH/s (Diglucky has provided a 6T overclocking solution).
To put this in perspective: in the current post-2024 halving era, where the block reward sits at 3.125 BTC and network difficulty hovers near 100+ Trillion, efficiency is not a luxury—it is a mathematical necessity. Operating at approximately 15 J/TH, this device sits at the bleeding edge of semiconductor physics.
This guide is not a marketing brochure; it is a technical manual designed to help you initialize, configure, and stabilize your NerdQaxe++, ensuring you contribute valid work to the SHA-256 algorithm with minimal rejection rates.

Phase 1: Preparation (The Engineering Prerequisites)
Before applying voltage, we must ensure the operational environment meets the strict requirements of ASICs. The BM1370 is a high-performance FinFET chip; it requires stable power and thermal management to prevent silicon degradation.
1. Power Supply Unit (PSU) Integrity
The NerdQaxe++ draws between 60W to 76W depending on your frequency tuning. While this seems low compared to an industrial rig, the stability of the DC delivery is paramount.
- Voltage: The device requires a 12V DC input.
- Amperage: You need a minimum overhead. We provide a 12V/10A (120W) power supply to ensure the voltage does not droop (V-Sag) during the high-current spikes that occur when the four ASICs ramp up their hashing frequency.
- Connector: The board utilizes a standard 5.5×2.5mm Barrel Jack. Ensure your connector fits snugly; loose connections increase resistance, generating heat and potentially causing voltage drops that lead to “Hardware Errors” in the logs.
2. Network Topology
The NerdQaxe++ utilizes an onboard ESP32-S3 microcontroller. Unlike Ethernet-based miners, this relies on 2.4GHz WiFi.
- Latency Matters: In mining, bandwidth is negligible, but latency is everything. A high-latency connection leads to Stale Shares—valid work that arrives at the pool after the block has already been solved by someone else.
- Requirement: Ensure your 2.4GHz WiFi signal is strong (RSSI better than -70 dBm). If your router uses “Smart Connect” (combining 5GHz and 2.4GHz), you may need to separate the SSIDs if the ESP32 struggles to handshake.
3. Wallet Address (Mainnet)
You need a valid SHA256 mainnet Bitcoin address.
- Recommendation: Use a Native SegWit address (starting with
bc1q) for lower transaction fees when you eventually move funds. - Warning: Do not use a Lightning Network address for the mining reward payout; Layer 1 block rewards (the 3.125 BTC + fees) must settle on-chain.
Phase 2: Setup & Implementation
We will now initialize the AxeOS firmware, the open-source brain controlling the brawn of the BM1370 chips.
Step 1: Power Injection and Boot Sequence
Connect the 12V/10A PSU to the wall outlet first, then plug the barrel jack into the NerdQaxe++.
- Observation: The cooling fan should spin up immediately. This is a PWM-controlled 40mm fan designed to displace heat rapidly from the custom heatsinks.
- Display Initialization: The 1.9-inch LILYGO T-Display S3 LCD will light up. On first boot, it will likely display a prompt indicating it is in “AP Mode” (Access Point Mode) with a SSID named
Nerdqaxe_****.
Step 2: The Handshake (WiFi Configuration)
The ESP32 is currently broadcasting its own WiFi network to allow you to inject credentials.
- Using a smartphone or PC, search for WiFi networks and connect to
Nerdqaxe_****. - Captive Portal: A configuration page should automatically pop up. If it does not, open a browser and navigate to
192.168.4.1. - SSID/Password: Select your home 2.4GHz WiFi network and enter the password carefully. Precision is key; a wrong password will force a factory reset loop.
Step 3: Stratum Protocol Configuration
This is where you direct your hashpower. The NerdQaxe++ speaks the Stratum Protocol, the universal language between miners and pools.
- Stratum URL: Enter your chosen pool. For solo mining, we recommend:
public-pool.io(Port 21496)solo.ckpool.org(Port 3333)- Note: Do not include
tcp://in the URL field if the UI has a separate protocol selector.
- Stratum Port: Enter the corresponding port (e.g.,
21496for Public Pool). - Stratum User: This is critical.
- Format:
YourBTCAddress.WorkerName - Example:
bc1qxy2...89a.QuadBeast01 - Password: Usually just
xor123. Most pools do not require a secure password here as the authentication is the wallet address itself.

Step 4: Frequency and Voltage Tuning (The Sweet Spot)
The AxeOS firmware allows for granular control over the BM1370 chips.
- Default Settings: The device ships with a balanced profile targeting 4.8 TH/s.
- Optimization Strategy:
- Efficiency Mode: Lower the voltage slightly (e.g., 1150 mV) and frequency (450 MHz) to improve the J/TH ratio, reducing heat and noise.
- Turbo Mode: The hardware can handle higher frequencies, but you must monitor the VRM (Voltage Regulator Module) temperature.
- Action: For the initial setup, leave these at default. Click Save and Restart.
Phase 3: Verification & Testing
Once the device reboots, it connects to your WiFi and begins the “handshake” with the mining pool. It is time to verify the telemetry.
1. Accessing the Dashboard (AxeOS)
Find the IP address displayed on the NerdQaxe++ LCD screen (e.g., 192.168.1.55). Type this into your desktop browser. You are now inside the miner’s brain.
2. Interpreting Key Metrics
- Hashrate (5s / Avg): You should see the hashrate climb to approximately 4.8 TH/s. It will fluctuate; this is normal due to the probabilistic nature of finding nonces.
- Best Share / Difficulty: You will see a “Best Share” value. This represents the hardest mathematical problem this specific device has solved since booting.
- Analogy: If the network requires rolling a die with 1,000,000 sides to land on ‘1’, and you rolled a ’50’, that ’50’ is your “Best Share.” It wasn’t good enough for a block, but it proves you are working.
- Temperature: Monitor Chip Temp and Board Temp.
- Safe Zone: Under 75°C.
- Danger Zone: Above 85°C. The BM1370 is robust, but thermal throttling will occur to protect the silicon.
3. Pool-Side Verification
Go to your chosen pool’s website (e.g., public-pool.io) and enter your wallet address. You should see your worker (QuadBeast01) active.
Troubleshooting & Optimization
Even industrial-grade hardware encounters physics. Here is how to diagnose common anomalies.
Issue 1: “Zero Hashrate” or “Connection Refused”
- Symptom: The screen shows an IP address, but Hashrate is 0.
- Root Cause: Stratum Protocol mismatch or Router Firewall. Some routers block standard mining ports (3333).
- Fix: Try using port
443or80if the pool supports it, or whitelist the device IP.
Issue 2: Device Reboots Randomly
- Symptom: The Uptime counter keeps resetting.
- Root Cause: Power Starvation. When the four BM1370 chips sync their work, there can be millisecond-long current spikes.
- Solution: Ensure you are using the included 12V/10A PSU. If you are using a generic 5A adapter, the voltage is sagging and triggering a brownout reset.
Optimization: Maximizing J/TH (Joules per Terahash)
- The Goal: Lowest Watts for Highest Hashes.
- The Tactic: Lower the Core Voltage in 20mV increments.
- The Test: After each drop, run the miner for 30 minutes. Check the HW Error Rate.
< 0.1% Errors: Stable. You can go lower.> 1.0% Errors: Unstable. The chips are “starving.” Increase voltage immediately.
Conclusion: The Long Game
You are now running a 4.8 TH/s node. While this is a fraction of the global hashrate, remember that in Solo Mining, outcomes depend on network difficulty and computational probability. You are operating a persistent hardware node that continuously validates the network 4.8 trillion times every second.
With the NerdQaxe++, you have removed the layers of opacity between you and the blockchain. You are not renting hashpower; you own the silicon. Keep your thermals low, your power clean, and your uptime high.
Ready to Start Your Project?
Get a factory-direct quote for your B2B project, or shop our B2C store for the best prices.